Custom Domains
Use your own domain for geo short links
Use Your Own Domain for Geo Links
By default, your geo short links use GeoSwap's short domain. But if you want your links to feel like your brand, you can add a custom domain.
Instead of gswp.me/promo, your links become geo.yourcompany.com/promo. Same smart geo-targeting, your brand front and center.
How to Set Up a Custom Domain
Adding a custom domain takes about five minutes. Here's the step-by-step:
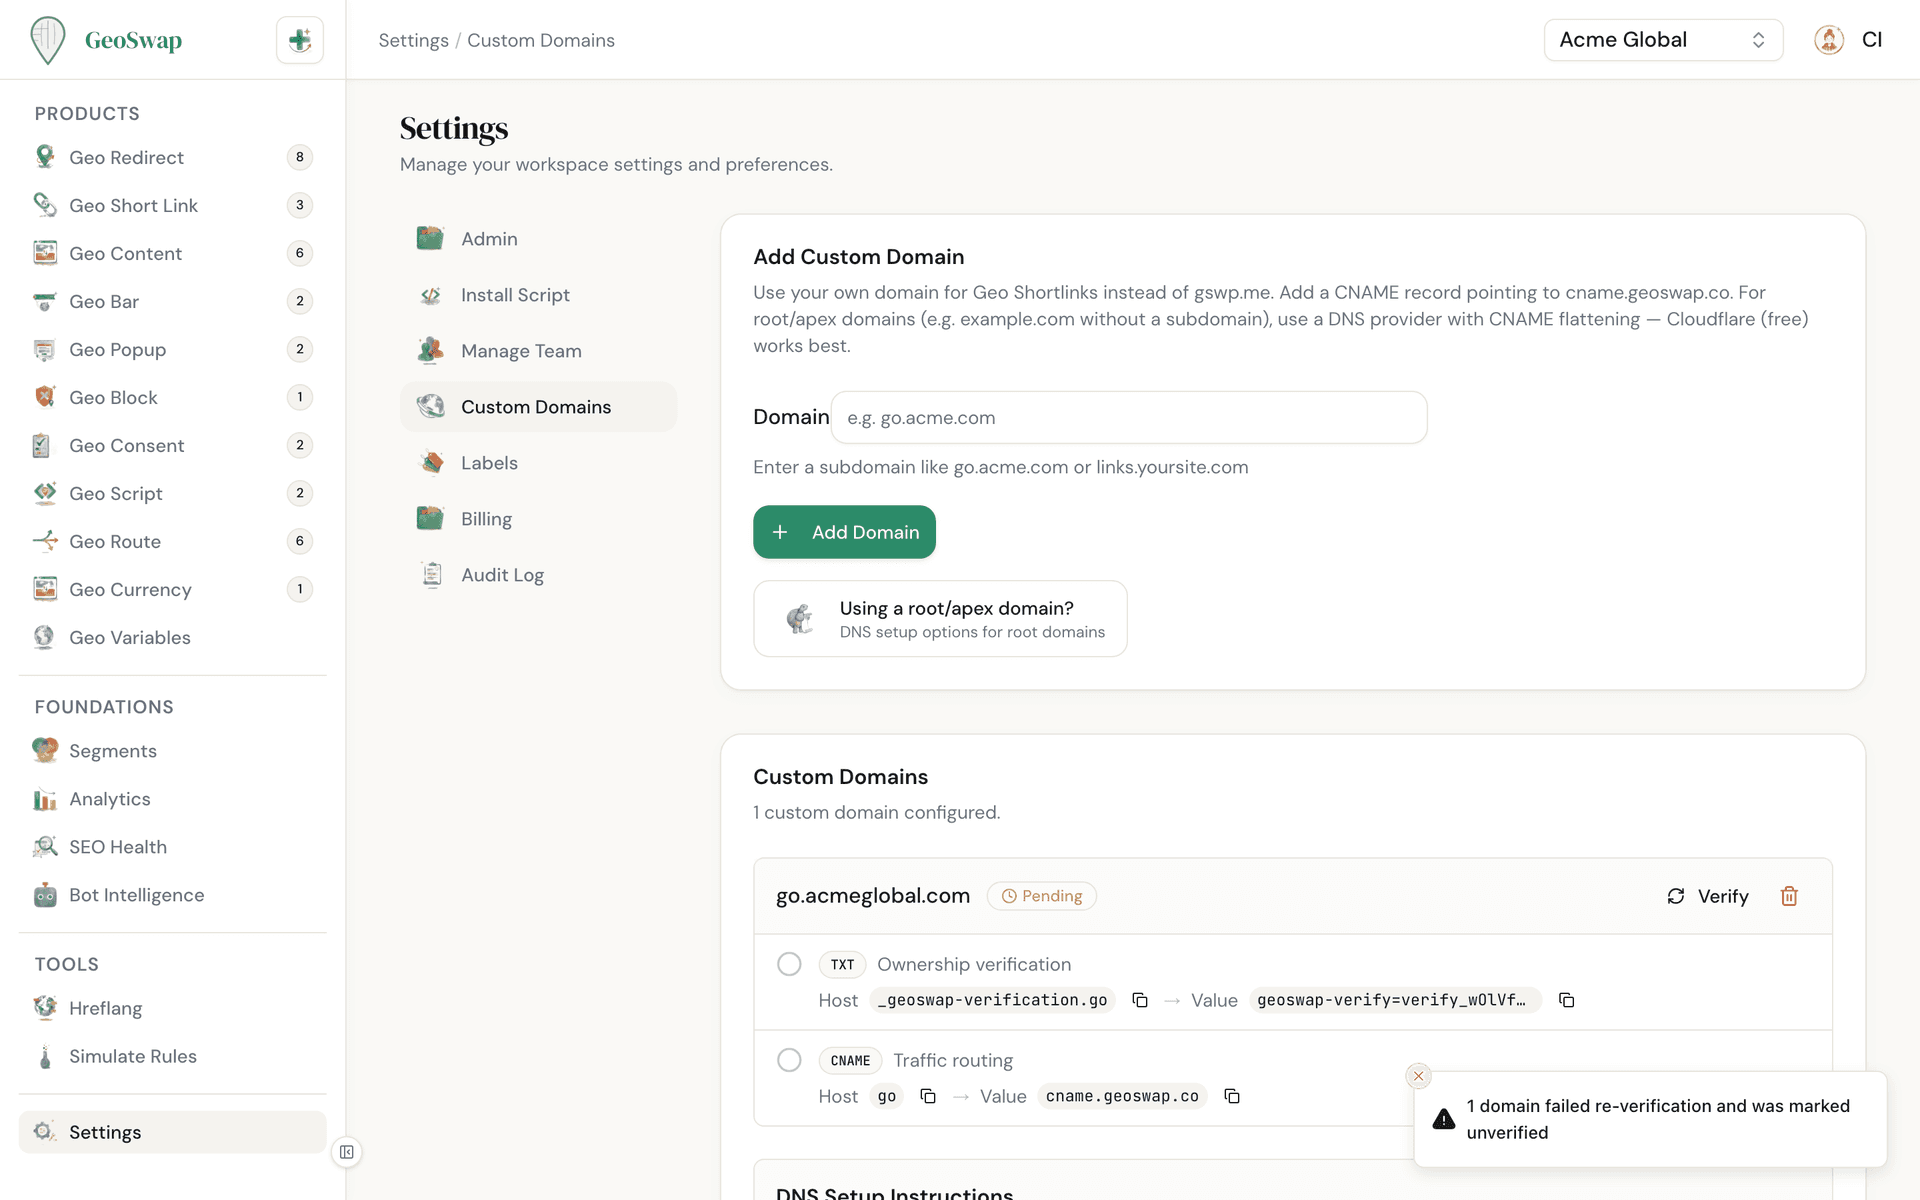
Go to Settings
In your dashboard, navigate to Settings → Custom Domains.
Click "Add Domain"
Enter your domain (e.g., geo.yourcompany.com). We recommend using a subdomain rather than your main domain.
Add the TXT record
Copy the TXT record GeoSwap gives you and add it to your domain's DNS settings. This proves you own the domain.
Add the CNAME record
Copy the CNAME record and add it to your DNS. This tells the internet to route traffic through GeoSwap's edge network.
Click "Verify"
GeoSwap confirms both records. Once verified, your domain is live and you can start creating geo links on it immediately.
DNS Records Explained
If you're not familiar with DNS, here's a plain-English explanation of the two records you need to add:
TXT record
A text-based record that proves you own the domain. It's like a digital signature — GeoSwap gives you a unique code, and adding it to your DNS proves the domain is yours.
CNAME record
A record that points your domain to GeoSwap's edge network. When someone visits your custom domain, the CNAME tells the internet to route that request through GeoSwap, where geo-targeting happens before the visitor sees the result.
Both records are required. The TXT record is for ownership verification, and the CNAME is for routing traffic. GeoSwap shows you the exact values to copy — no guesswork needed.
SSL Certificate
Automatic HTTPS
SSL is provisioned automatically by Cloudflare the moment you add your custom domain. No manual certificate setup, no renewals to worry about. Your visitors always see the padlock icon.
Tips
Use a subdomain (e.g., geo.yourdomain.com) rather than your main domain. This avoids conflicts with your existing website.
DNS changes can take up to 48 hours to propagate, but it’s usually much faster — often just a few minutes.
Each custom domain can only belong to one workspace. If you need multiple brands, create separate workspaces.
Admin or owner role is required to add and manage custom domains.
You can add multiple custom domains to the same workspace if you need links on different branded domains.
Next up
Learn about plans and billing for your workspace.